From simply exchanging pictures and chatting with friends, WhatsApp has evolved to make communicating with clients simple. The WhatsApp Business app is responsible for this modification.
WhatsApp has introduced WhatsApp Business, an accessible platform. With almost 2.8 billion users globally, WhatsApp has evolved from a simple messaging software to a vital tool for customer service.
Nowadays, the majority of internet users prefer WhatsApp over other chatting apps. According to Statista, it is the most widely used mobile messenger app, surpassing Facebook Messenger and Instagram.
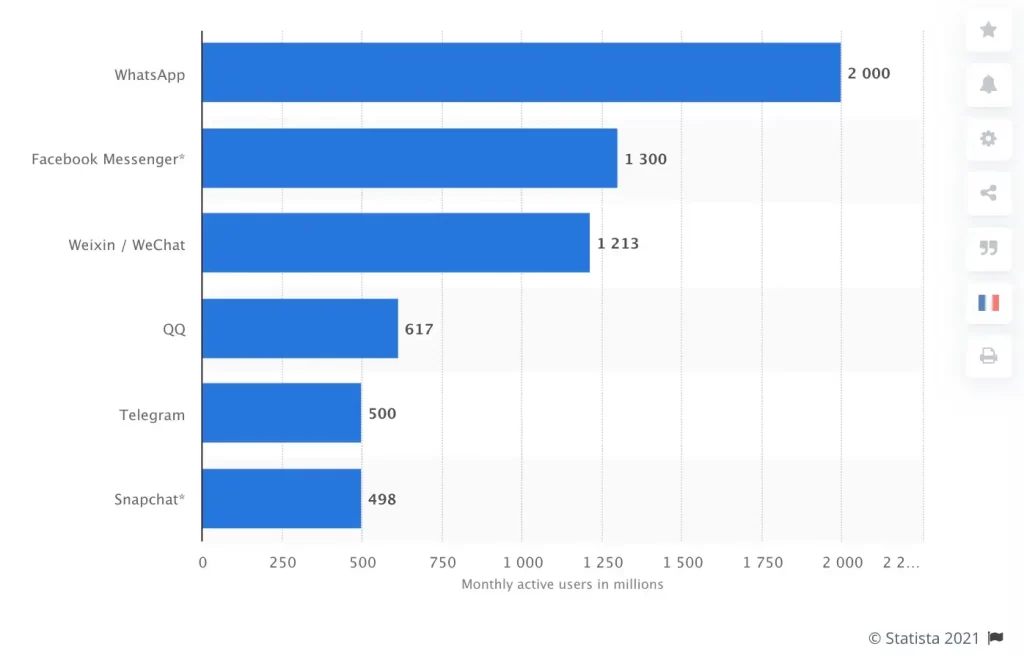
Source: statista.com
What is a WhatsApp Business Account?
WhatsApp Business is designed only for businesses, and all account interactions remain formal. It has useful features like Greeting Messages, auto-reply, and much more to make communication quicker and easier.
WhatsApp Business enables businesses of all sizes to communicate with clients on WhatsApp without the need for an additional app.
It provides you with basic tools to handle client interactions more efficiently and separates your personal and professional discussions.
Types of WhatsApp Business Accounts:
There are two types of WhatsApp Business Accounts.
Business Account:
Any account that uses the WhatsApp Business App or API is automatically classified as a business account. There won’t be a green badge or green tick next to the company name on a business account.
Official Business Account:
A WhatsApp Official Business Account (OBA) comes with a green badge next to the business name, showing that WhatsApp has verified and approved the account. This green badge is earned through a fair verification process—businesses can’t pay WhatsApp to get it.
How to Setup WhatsApp Business Account?
Step 1:
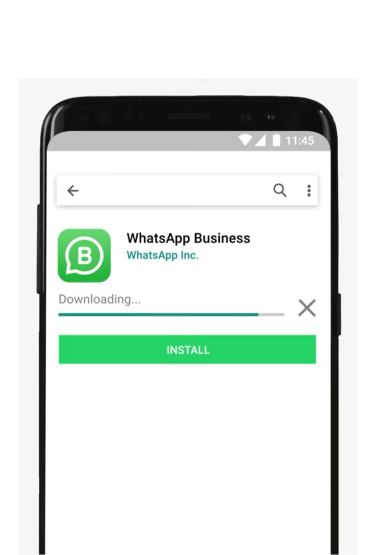
Download the WhatsApp Business App:
First, download the WhatsApp Business app from the Play Store or the Apple App Store. This app was specifically created for small and medium enterprises. Make sure it is installed in your system before proceeding to the next step.
Step 2:
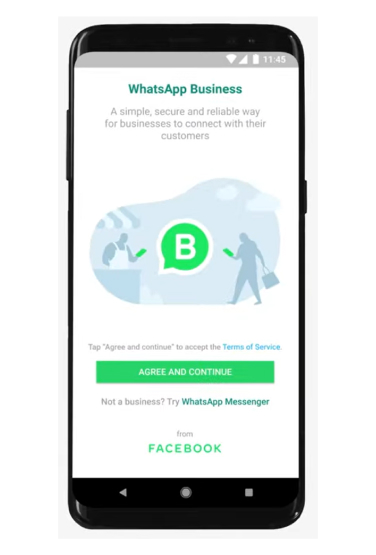
Accept the Terms of Service and Click Continue:
Please read the Terms of Service regarding the recent update to WhatsApp’s business policy. Then click “continue” after agreeing to the terms and conditions.
Step 3:
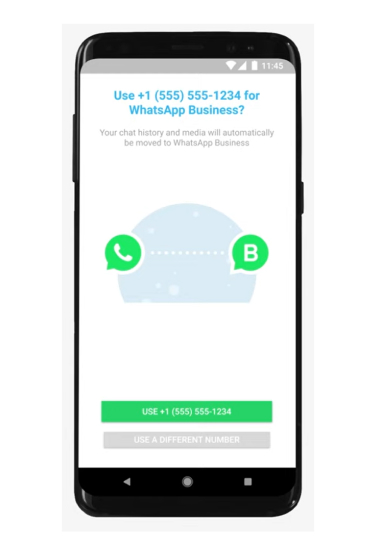
Confirm Your Business Phone Number:
Once you’ve installed the WhatsApp Business app, open it and choose your country from the dropdown menu. Then, enter your business phone number.
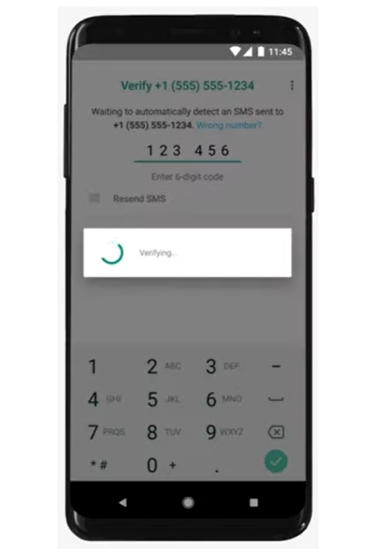
After entering your number on WhatsApp, you will receive a 6-digit verification code. Enter it to complete the process. To add contacts to your WhatsApp business account, give access to your contacts on the platform.
Step 4:
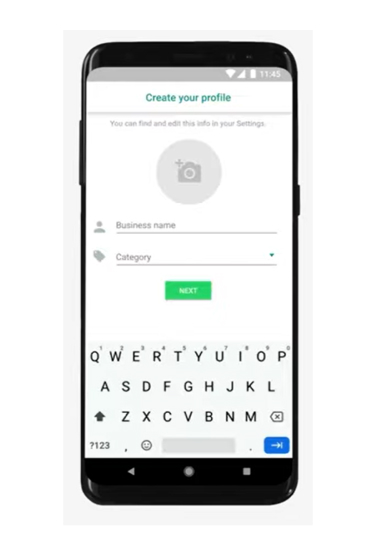
Fill in Your Business Information:
Provide the following details to complete the business profile.
- Business Name: Enter the official name of your company that you use to communicate with your audience.
- Profile Picture: Use your Company Logo
- Category: From the given dropdown list, choose the appropriate business category.
- Description: Give a complete description of your business with specific details of your product or services.
- Business Address: Add your official company address.
Step 5:
Set Up Auto-Reply Messages:
Setting up automated messages is important once your WhatsApp Business account is ready. It’s easier to interact with your consumers when you use these easy options to provide personalized greetings, handy-away messages, and quick replies.

Step 6:
Organize Your Products or Services Catalog:
In this last step, create a simple product or service catalogue. Customers will find it easier to browse and inquire about your products and services, which will assist them in locating what they need and promote smooth transactions.
- Access the Catalog Feature: Go to the ‘Catalog’ option in the ‘Settings’ menu of the WhatsApp Business app.
- Add Products or Services: Upload high-quality images of your products or services.
- Complete the details: Provide the name, price, and description for each item.
- Save and Publish: Save your entries and publish the catalogue for customers to view.
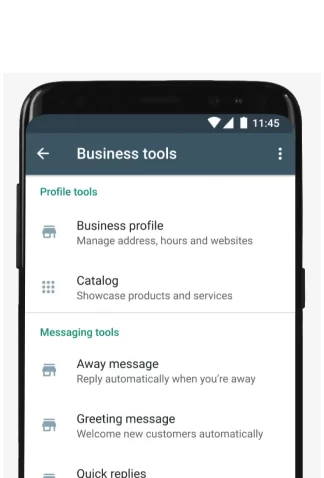
Additional Features:
There are a few additional features that come with the WhatsApp business account.
- Add operational hours, email, and website details to your profile to enhance visibility.
- You can organize your contacts with labels for targeted communication.
- You can integrate a chatbot with your account to automate responses and improve customer interaction.
How to Convert Your Personal WhatsApp to WhatsApp Business Account?
Follow the below-mentioned steps to convert your personal account to a business account.
Step 1: Update and create a backup for your existing WhatsApp account.
Step 2: Download the Whatsapp Business app from the Google Play Store or Apple App Store.
Step 3: Accept the terms of service to proceed further.
Step 4: Use your current number used in your personal account to register your business account.
Step 5: Transfer all your data, like images, videos, messages, and contacts, to the WhatsApp business account.
Step 6: Click continue or restore to allow permission to share all your data from your personal account.
Step 7: Create a WhatsApp business Account profile by filling out details like name, category, profile picture, and description.
How to get Green tick to your Whatsapp Business account?
To verify your WhatsApp Business account, confirm that your company is linked to the WhatsApp Business APIs and finish the Facebook Business Manager Page verification process. Only trusted brands receive the green verified badge.
Make sure two-factor authentication is set up before making your request, and add an official email domain from your business or entity rather than Gmail or Yahoo.
When applying, check that your display name follows the guidelines to avoid any issues.
How to Set up an Official Business Account: A Step-by-Step Guide
To apply for an Official Business Account, ensure your business is connected with the WhatsApp Business API. After that, you can ask for verification through Facebook Business Manager by following the simple steps below.
1. Log in to Your Facebook Business Manager:
First, log in to your Facebook Business Manager account.
2. Go to WhatsApp Account Settings:
Navigate to Business Settings > Accounts > WhatsApp Accounts to see all the accounts connected to your business.
3. Choose the Account to Verify:
Pick the WhatsApp account you want to get verified.
4. Contact Support:
Click on Settings, then select Contact Support for help.
5. Request Official Business Account Status:
In the top-right corner, click Ask a Question and choose WABiz: Request official business account status.
6. Fill in the Required Information:
Enter the details you asked for, and you can check the status of your request under Direct Support in your Facebook Business Manager account.
Once your request is accepted, your WhatsApp account will be upgraded to an official business account with a certified green badge.
How WhatsApp Business Can Benefit Your Business?
A WhatsApp Business account helps you connect with customers more efficiently and manage your business communications smoothly. Here’s how it can add value to your business:
1. Establish a Professional Presence
Create a business profile with your name, address, and working hours, ensuring customers can easily find and trust your business.
2. Make Key Information Easily Accessible
Share your website, email, and social media links, allowing customers to connect with you effortlessly.
3. Streamline Customer Conversations
Use automated replies, quick responses, and chat sorting to manage inquiries efficiently and improve customer satisfaction.
4. Organize Chats for Better Workflow
Label conversations based on priority, order status, or customer type, helping you stay organized and responsive.
5. Showcase Your Products and Services
Send high-quality images, brochures, and other media to highlight your offerings and provide a better customer experience.
Bottom Line:
WhatsApp Business is a flexible platform for businesses looking to automate customer support. It is also a popular personal communication tool, which gives entrepreneurs an advantage in connecting with customers more effectively.


